Equipment:
It is important you have access to the right equipment. Here are a few things you must have to ensure you complete the work to a high standard.
Belt Sander – Drum Sanders can also work but they can be more time consuming and much less dust efficient than a professional belt sander.
Eder Sander. This allows you to sand right up close to the edge of the room and leaves you with a much tidier finish.
Corner Sander like Festool Rotex RO90 with a corner attachment
Dust Extractors like a Festool CT or a Pallmann Dust
Fine Finishing Sander. – A Festool Rotex RO150 is ideal to get up to the edge and into Corners.
A large finishing Sander like a Bona Flexi Sand will give a very smooth finish to the main floor area
Sanding Abrasives.
You have a choice of many different types of abrasives. Silicon Carbide, Aluminium Oxide, Ceramic or Zirconia
If you choose a gentler abrasive like Aluminium Oxide you can start with a 40 Grit then move to a 60 Grit finish at an 80 Grit and give the floor a fine finishing sand with a 120 grit
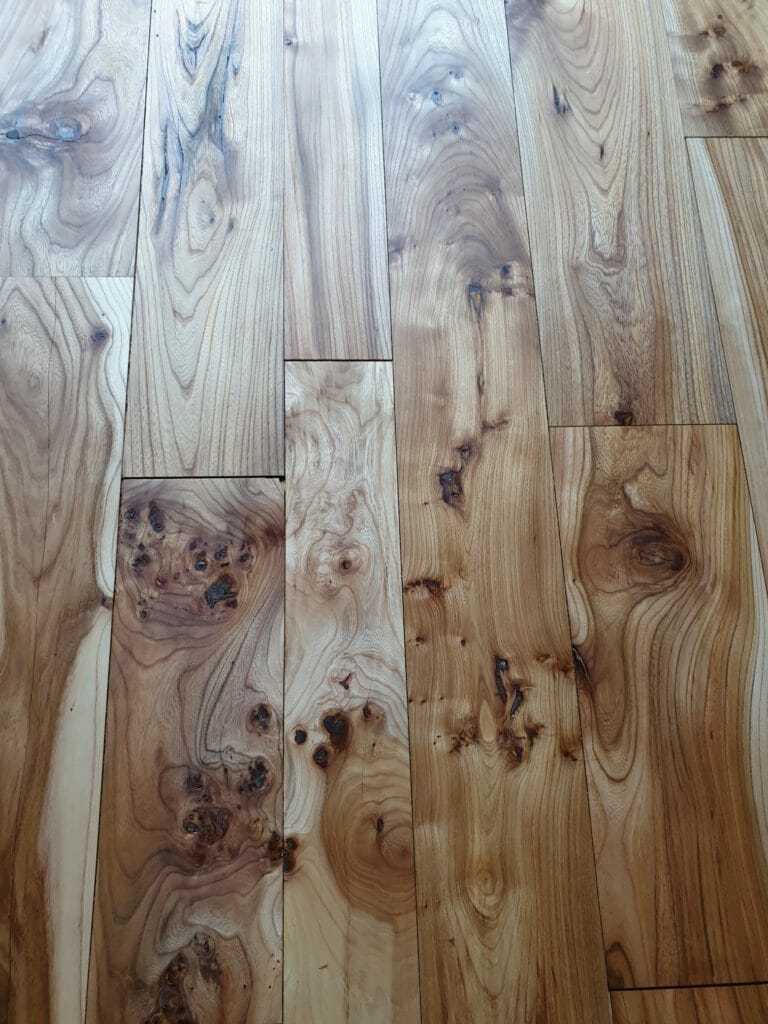
Floor Sanding Process:
Start by driving nails below the surface and sweep the floor clean. Be aware of any nails or other items standing proud will damage the sanding machines.
Start sanding the floor WITH the grain if the wood – Never sand against the grain as it will leave bad scratch marks. Depending on how bad the floor is you will either start with a 24 grit (very aggressive) of a 40 Grid sanding belt.
Sand the floor evenly in a forward and backward motion. Use a steady and consistent pace. Do not let the drum sit on the floor as it will leave drum marks on the floor.
Once the floor has been sanded clean you can change over to the next belt. If you sanded with a 24 Grit now move to 40 or if it was 40, move to 60. Start at the edge of the room like before and sand the floor evenly in a backward and forward motion.
Once done change to the next grit up and repeat as above until you have sanded the floor up to an 80 grit with the belt sander.
It is now time to sand the edges. Depending on how uneven the floor starts with the appropriate sanding disc – Like with the belt sanding move up between the grits once each grit is done.
The edger sander is used at a slight angle to the wall and you sand in a small circular motion.
Now the floor is sanded using the belt and edger sanders ensure you remove all dust created from the sanding (including bags of dust out from the room and dispose of in a safe way. In some cases, there is a fire risk with the dust so ensure you do not leave it inside the building overnight. This includes any oils and cloths exposed to oil when oiling a wood floor. Take great care. Ensure machines are left with empty dust bags overnight INCLUDING the dust extractor.
You can now proceed to use the corner attachment to sand the corners. Be careful not to force the tool down to hard as it will damage the Velcro pads. These will be charged for if they are damaged. Ensure you change the Triangle sanding discs often enough – You can turn it to make use of each of the 3 corners of the sanding discs
Next step is to give the floor a fine finishing sand.
This is done using the Bona Flexy Sand or Pallmann Spyder.
You can sand any scratch marks left by the edger sander out using the Rotex RO150
Vacuum the floor clean and you can proceed to apply your finish.
For the best results, it is advised to apply Pallmann Floor Finishes.
For support please call 01223863632